1. Open Outlook. If the Microsoft Outlook Startup wizard appears, on the first page of the wizard, click Next. Then, on the E-mail Accounts page, click Next to set up an email account.
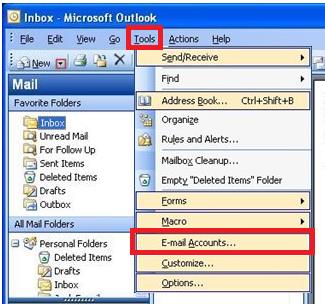
- If the Microsoft Outlook Startup wizard doesn't appear, on the Outlook toolbar, click Tools, click E-mail Accounts.
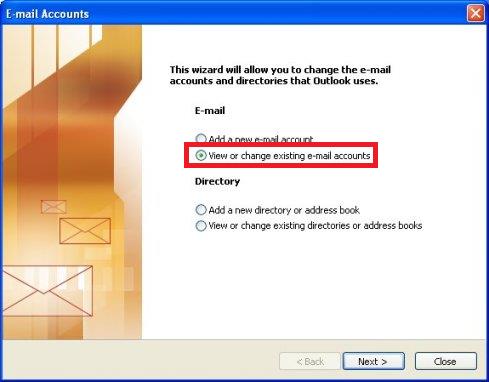
Now Click on View or change existing e-mail accounts, then click Next
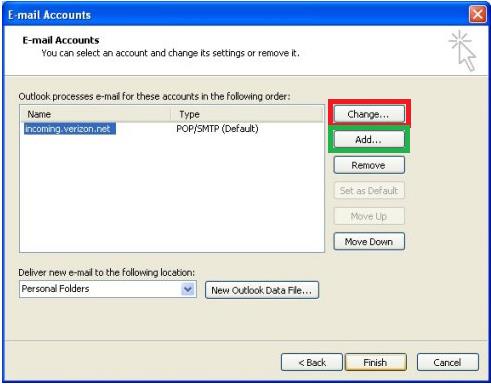
Now click on Add
2. Click POP3, and then click Next.

3. Provide the following information on the Internet E-mail Settings page.
Under User Information:
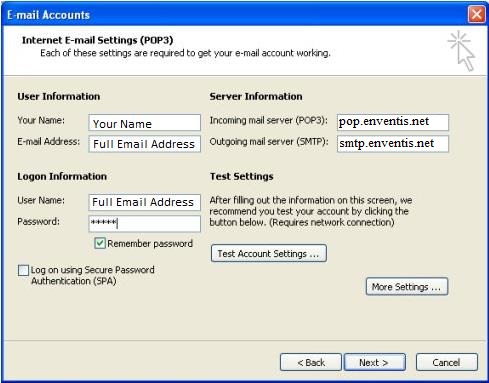
1. In the Your Name box, enter the name you want users to see when you send email from this account.
2. In the E-mail Address box, enter your email address.
Under Server Information:
1. Under Account Type, select POP3.
2. In the Incoming mail server box, enter the POP3 server name:
POP3: pop.enventis.net
3. In the Outgoing mail server (SMTP) box, enter the SMTP server name:
SMTP: smtp.enventis.net
Under Logon Information:
1. In the User Name box, enter your full email address.
2. In the Password box, enter your email password. If you want Outlook to remember your password, make sure the check box next to Remember password is selected.
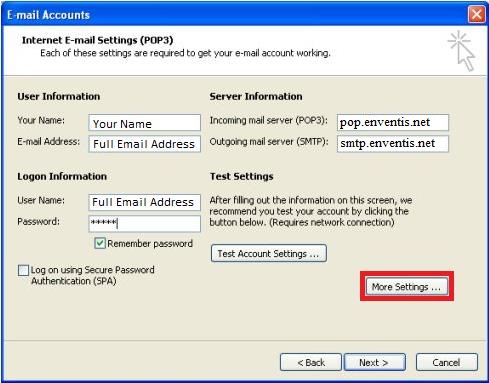
4. At the bottom of the page, click More Settings, and then fill in the Internet E-Mail Settings dialog box as follows:
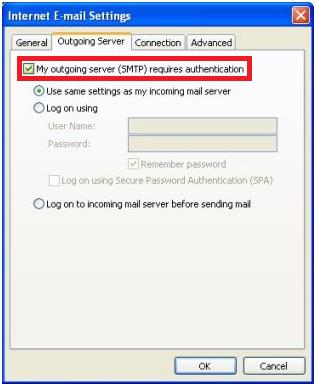
1. Click on the Outgoing Server tab and select My outgoing server (SMTP) requires authentication.
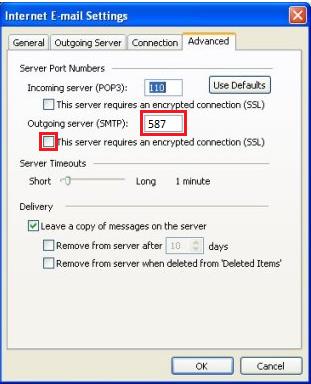
2. Click on the Advanced tab. Under Incoming server (POP3) you will enter the following:
POP3: Enter incoming port as 110 and the outgoing port as 587
*Some devices may require that you use port 465*
Then *for Outgoing Server (SMTP) only* check the box for This server requires an encrypted connection (SSL)
3. If you're using POP3 and you want to keep a copy of your messages on the server, under Delivery, click Leave a copy of messages on the server. If you don't select this option, all messages will be removed from the server and stored locally on your computer.
Click OK.
5. On the Add New Account page, click Next. After Outlook tests your account, click Close to close the Test Account Settings dialog box.
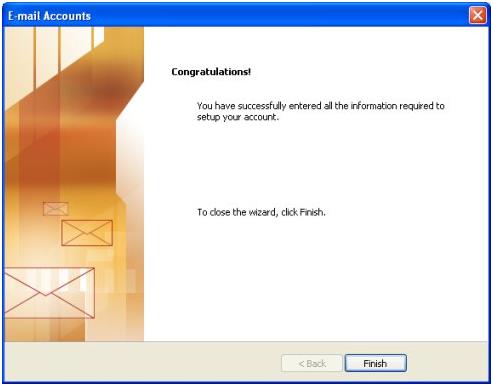
6. On the Congratulations page, click Finish.
7. On the Account Settings page, click Close.